Since my discovery of the ever-addicting Pinterest, I’ve
been flooded with lots of fun and crafty ideas.
Recently, a friend of mine told me she had an older chest that she
wanted to strip and re-do. She asked if
it was something I could help her with since she is expecting a beautiful baby
girl in April and wouldn’t be able to do it herself. My first thought was, “Yay! Congratulations”
and my second was, “Yay! A chance to get some experience and try out some of
the fun ideas I’ve found.”
Unfortunately, I didn’t take any before pictures of the
chest so I will do my best to describe it to you. It is probably at least 20
years old, had about 5 layers of different, thick paints on it, was missing the
majority of its knobs, and even had a few knicks and cracks on it. Let’s just
say it has been really loved over the years. ;)
First things first, we started by stripping the paint. Find yourself a fairly warm and large area to
work. Take the drawers out, grab an old,
large paint brush that you don’t mind messing up, and start applying thick helpings
of Citristrip over all painted areas of the piece.
Let the stripper marinate on the piece for anywhere from 1 –
24 hours. The thicker and older the paint, the longer you’re going to want it
to sink in. For the record, it took about 2.5 times of applying the Citristip
for this project.
You will know when it’s time to start scraping the paint
off, because the paint will have a bubbled effect. Next you’ll need a decent sized paint
scraper. Be sure to follow the grain of
the wood (if you’re working with wood) and carefully scrap off the paint and
gel mix.
Once you have finished scraping off as much of the paint as
you can, you’ll want to take an old rag and mineral spirits and wipe down your
piece. Don’t go overboard, just enough to gently wipe it over.
From this point, you will need to let the piece dry out,
especially working with wood. Hopefully
you’re working in a climate controlled area where you can leave it for a day or
two. You will be able to tell when the piece has dried completely.
Next, if there are still a few leftover flecks of paint, or
rough areas, you will need to sand them down. Depending on the size of your
piece, I recommend using either a square sanding block that’s easy to grip, or
an electric palm sander. I used the Skil
Palm Sander, and it made the sanding portion of this project a breeze!
Once you’re finished sanding wipe the piece down to remove
any debris. In my case, the dresser has so many layers of paint and was so old,
that the paint was actually embedded into the dresser in some parts. So, I had to apply a layer of primer before I
could attempt to paint it the desired color.
Otherwise, if you’re staining the wood, this would be the part where you
go ahead and stain it.
My friend originally wanted to strip the chest and stain it
to match the crib she had purchased. Once I told her that it wouldn’t be
possible to stain it because of the deep paint stains, we decided to find a
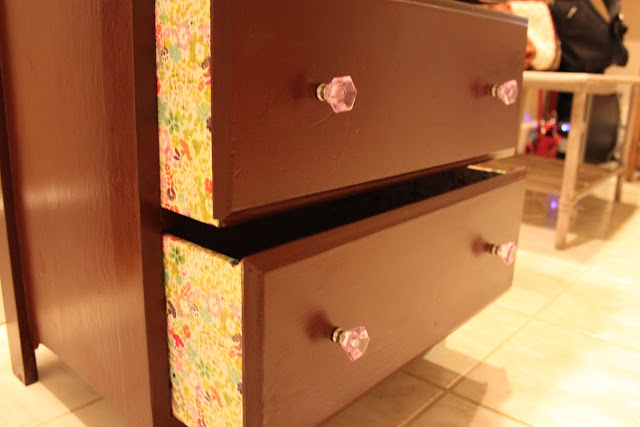
paint that was as close to the color of the crib as possible. We decided on Valspar Buckeye Brown Gloss.
We applied two coats of the beautiful brown paint, and then
moved on to a few small finishing touches.
My friend has decided to go with Lavender and Green for her daughters
room, so I thought, what better way to add a special touch, than through her
color theme. I made a trip to Michaels
and found some purple wood grain and green and purple flower pattern scrapbooking
paper. Using Mod Podge, I carefully
decoupaged the inside of the drawers, so each time she opens one, she’ll get a
little pop of color! My mom also helped me find perfectly matching lavender knobs for the drawers from target.
And here is the final product:


No comments:
Post a Comment